Updating Halo Link
Halo Link will silently auto-update by default. For other options, see below.
Release notes
Details of each release and what changed in each version can be found in the Release notes. Each entry lists the Halo Link and Halo Cloud changes included in the release. Not all releases contain changes to both.
Updating & checking for updates
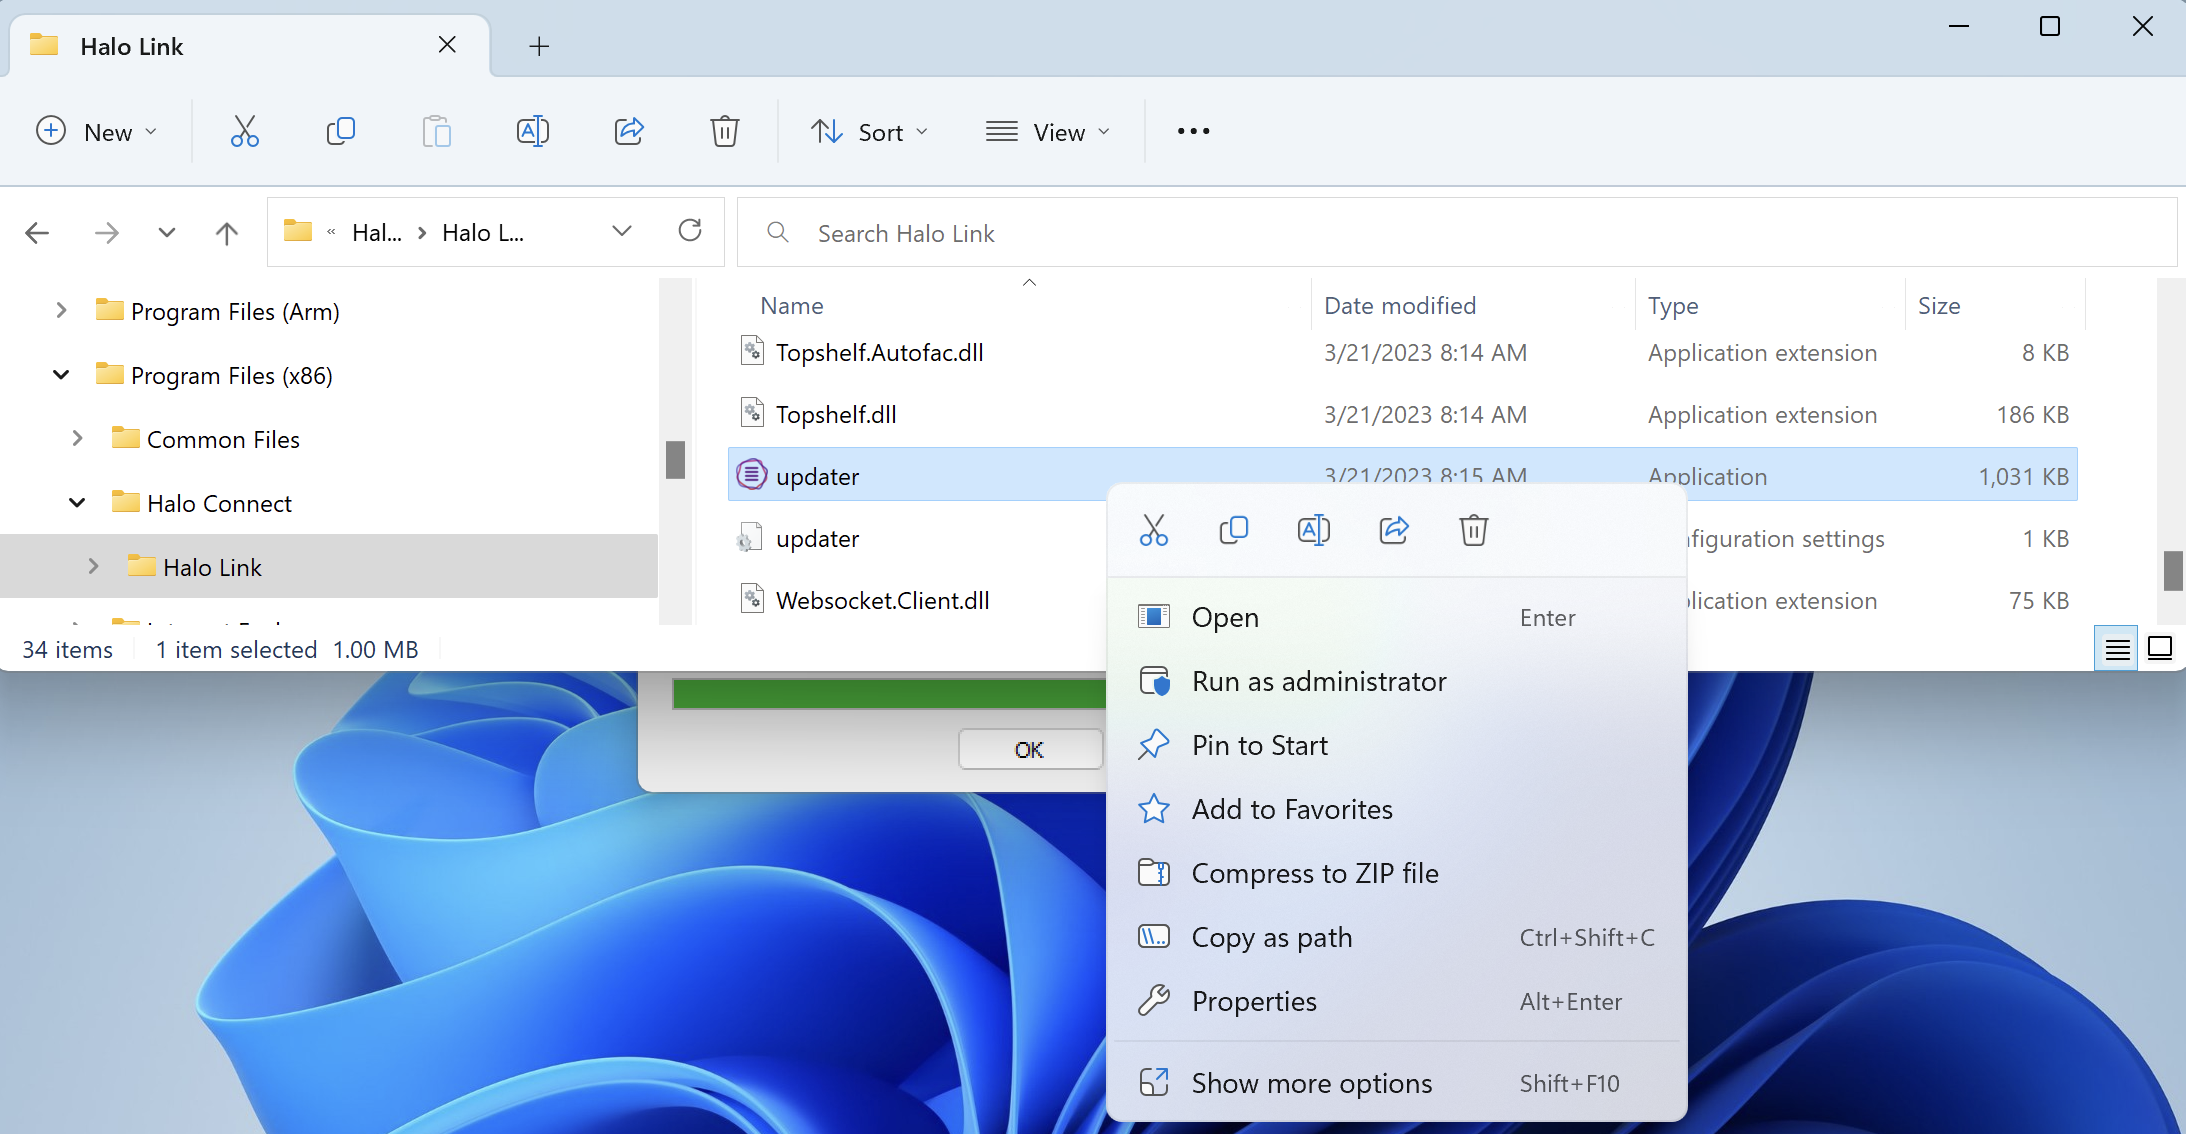
Via the updater application
- Open the file manager.
- Navigate to C:\Program Files (x86)\Halo Connect\Halo Link, or copy and paste that location into the navigation bar.
- Locate the “updater” application
- Right click and choose “Run as administrator”
From the command line
Open the terminal as an administrator
Run: cd C:\Program Files (x86)\Halo Connect\Halo Link
Then: start updater.exe
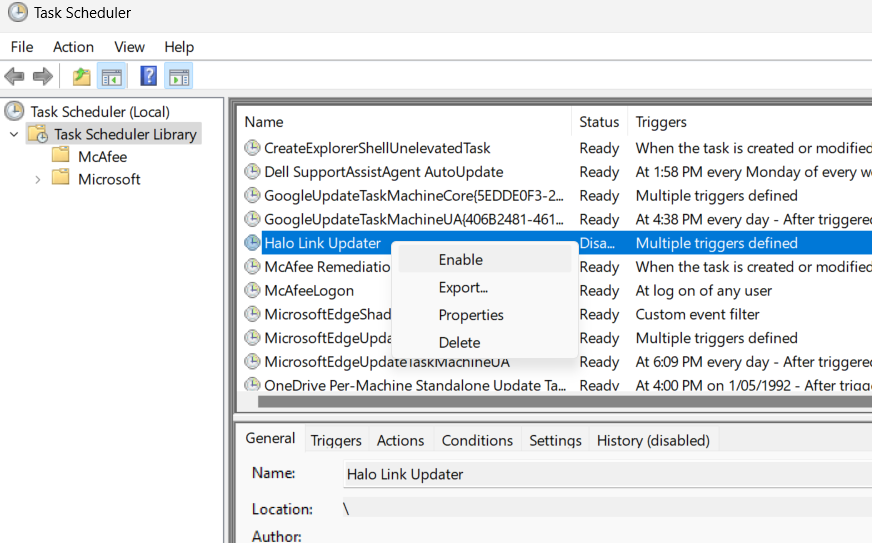
Enabling auto-update
Auto-update can be enabled via the Windows Task scheduler
- Open the Windows Task Scheduler.
- To run it from the commandline, press
Win+Rand typetaskschd.msc.
- To run it from the commandline, press
- Find the "Halo Link Updater" service.
- Right click "Halo Link Updater" to open the context menu.
- Click "enable".
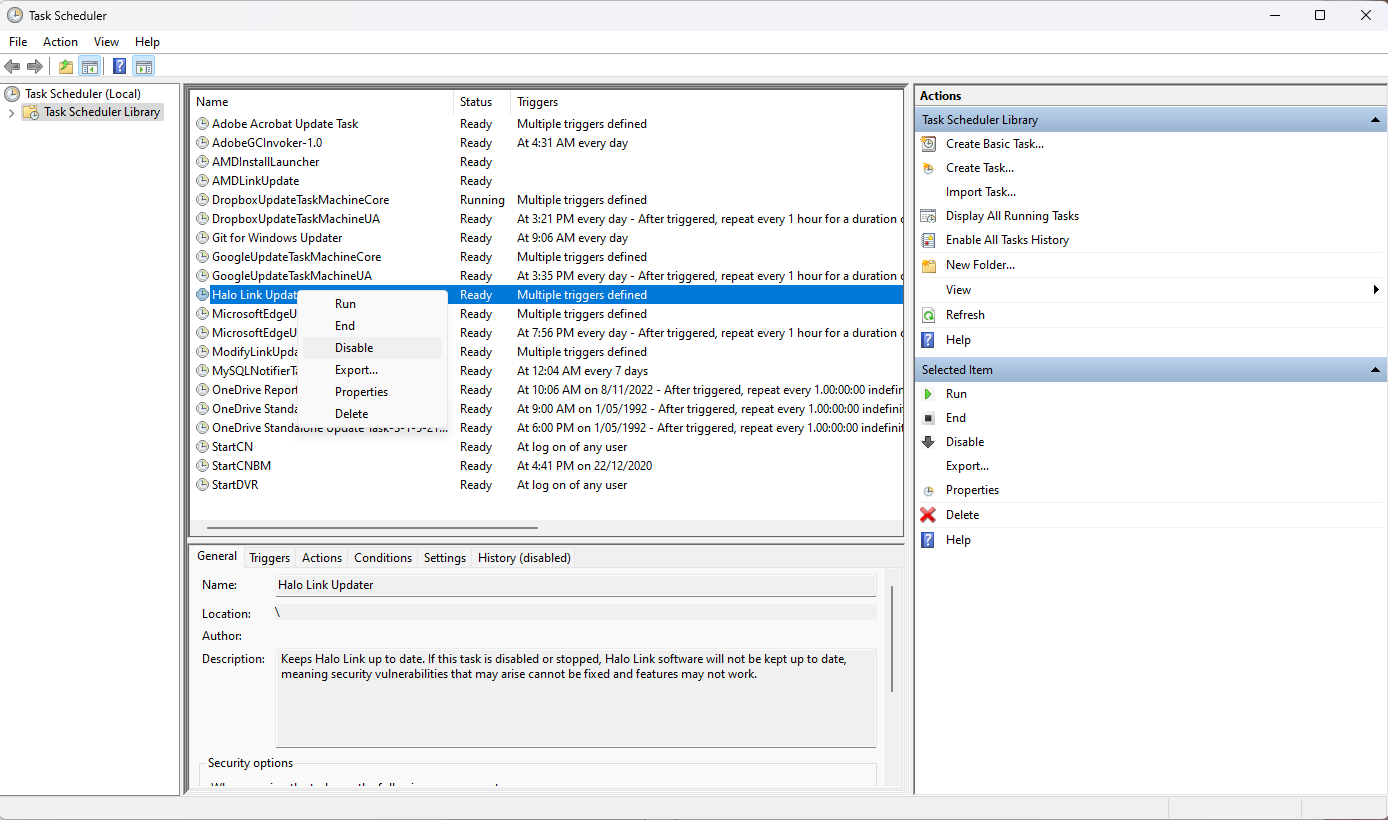
Disabling auto-update
Warning: Disabling auto-update is not recommended. Click to continue.
Halo Connect does not recommend disabling Halo Link's auto-update. Not updating could mean missing important security updates and bug fixes.
Disabling auto-update can be done via the Windows Task Scheduler.
- Open the Windows Task Scheduler.
- Find the "Halo Link Updater" service.
- Right click "Halo Link Updater" to open the context menu.
- Click "Disable".